Qnap NAS Gitea Installation
Intro
The following article describe how I managed to install Gitea on my Qnap 431-x2. Usefull links are located at the bottom of the article.
Docker
At first I wanted to use the ContainerStation provided out of the box with the QNAP server to host a docker image of Gitea. I could not make any docker image to install properly because there was no version arm/7 available, only arm/8.
Package Application
After many searches, I found out that Gitea was available as a Package application. The Package is not available from the Qnap server, but it is possible to download the package. My Qnap - QGit Package My Qnap - Gitea Package For my version, I had to download the TS-X41 version.
In the App Center, on the top right corner, click on the icon “Install Manuslly” then upload QGit then Gitea.
Configure Gitea
A Gitea icon should have appear on the desktop after the installation. Simply click on it. This will open a configuration webpage for gitea.
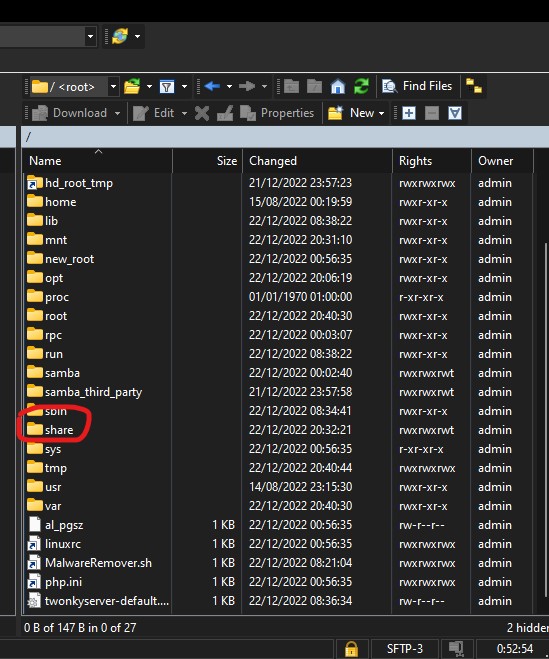
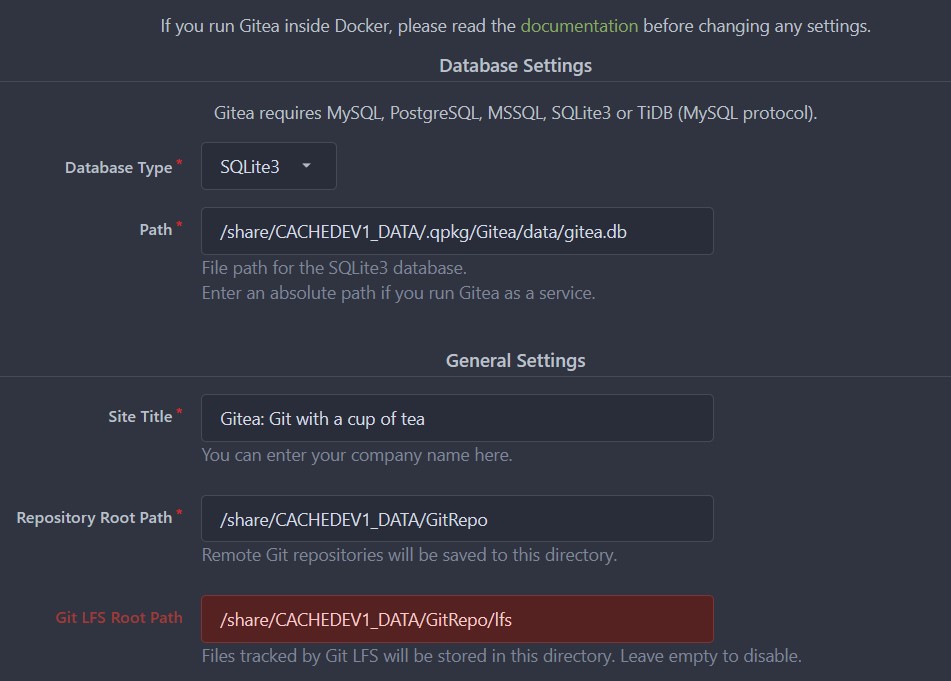
First step I did was to create a specific Shared Folder in the File Station for my repositories. (GitRepo) The Path to use in the config will be different. The way I found out mine was to configure the SFTP access on the NAS and activating the SSH access. I authorized my user to use the SFTP. Once the SFTP is working, when using WINSCP, the connection will show the root of the File System. By navigating first in the /share folder and drilling down, I found out the full path for my shared folder.
Here are the parameters I used :
When configuring from another computer, make sure that the localhost is replaced by the ip address of the NAS. (The one showing in the browser url). Once the configuration is done, the submit will take a while, 10-15 min for me. Dont panick, get a cup of coffee and check back in a few!
Config files are located in a subfolder of /share/CACHEDEV1_DATA/.qpkg.

